
A WatchGuard FireCluster (also known as a High-Availability firewall), is a great way to ensure there is physical redundancy for your firewall setup. Instead of having a single firewall running the connections in and out of your environment, you can implement a hot spare that is ready to take over at a moment’s notice.
FireCluster Prerequisites
Before setting up a FireCluster, there are several things to consider:
Both firewalls must be the exact same model. You cannot cluster devices that are different versions of hardware.
Both firewalls must be running the same firmware version before they are clustered.
Both firewalls must be activated before they are clustered.
It is possible to set up a FireCluster for a single device that is already in place. If you are interested in learning more or purchasing a high availability unit, Contact Us
FireCluster Modes
There are two ways that you can set up your FireCluster:
Active-Active FireCluster
If you are running an Active-Active FireCluster, both devices are operating and passing traffic at the same time. This mode requires that both devices with the suite of services that you desire.Active-Passive FireCluster
If you are running an Active-Passive FireCluster, one device passes traffic while the other is ready to take over as the hot spare. In an Active-Passive FireCluster, the first device is licensed with the suite of services you desire and second is licensed with LiveSecurity for warranty coverage.
FireCluster Roles
When you set up a FireCluster, one device will be the Master and the other device will be the Backup Master. These are purely roles that indicate which is in charge (the Master), and which is the current hot spare (the Backup Master). Your devices will swap roles as need.
FireCluster Configuration through Policy Manager
These steps walk through building a FireCluster from a new device. If you are attempting to cluster a device that is already in production, Contact JSCM Group for assistance.
Install the latest version of WatchGuard System Manager.
Make sure that you have activated both firewalls. Save their Feature Keys locally for easy access.
Make sure that both devices are on the same firmware version. If you have to upgrade either of the devices, make sure to factory reset them before attempting to build the cluster.
Connect an Ethernet cable from your computer directly into Eth1 on one of the devices. Make sure that your computer is capable of receiving a DHCP address, and that you get an IP on the 10.0.1.X network.
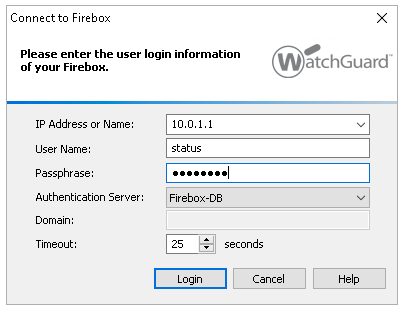
In WatchGuard System Manager, select File > Connect to Device. Input 10.0.1.1 as the IP address, status as the username and readonly as the password.
6. Once connected to the firewall, select Tools > Policy Manager to open the configuration.

7. Open the FireCluster configuration wizard under FireCluster > Setup

8. Click Next on the wizard to start the configuration.

9. Select if you will be setting up and Active-Active FireCluster or an Active-Passive FireCluster. Leave the default Cluster ID value as 50. (This only needs to be changed if you have multiple FireClusters in the same network.) Click Next.

10. Specify which interfaces you want to use for the Cluster interface and for the Management Interface. The Cluster interface is used to connect the two firewalls together. The Management interface is typically set on the Trusted network, and is used to manage the devices. Click Next.

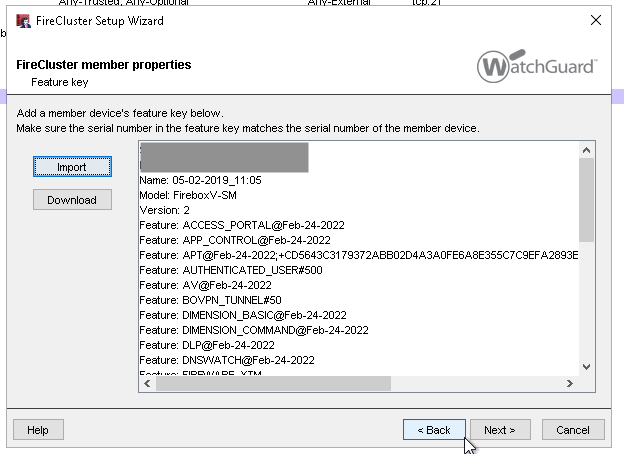
11. Make sure that the Feature Key of the first device is added. Click Next.

12. Name the first device. Click Next.

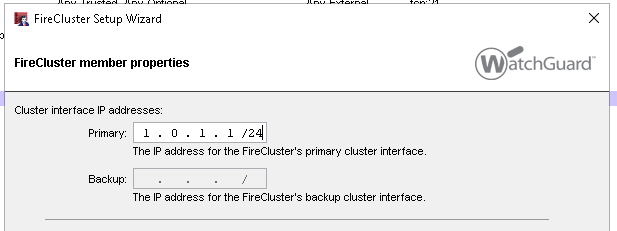
13. Set the first device’s Cluster Interface IP address. This needs to be a unique IP that is not used anywhere else inside of the network. For example, we have used 1.0.1.1/24.
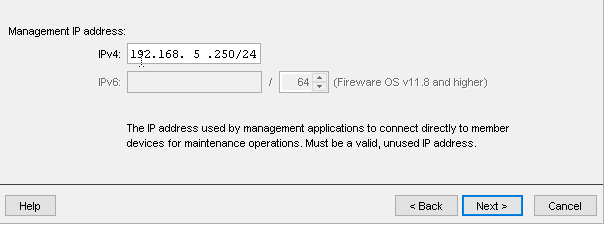
14. Set the Management IP address for the first device. If using the Trusted interface, this should be an IP address on the Trusted network that is not in use and not included in the DHCP scope. Click Next.
15. Select Yes to add another device and click Next.

16. Import the second device’s Feature Key. Click Next.
17. Name the second device. Click Next.
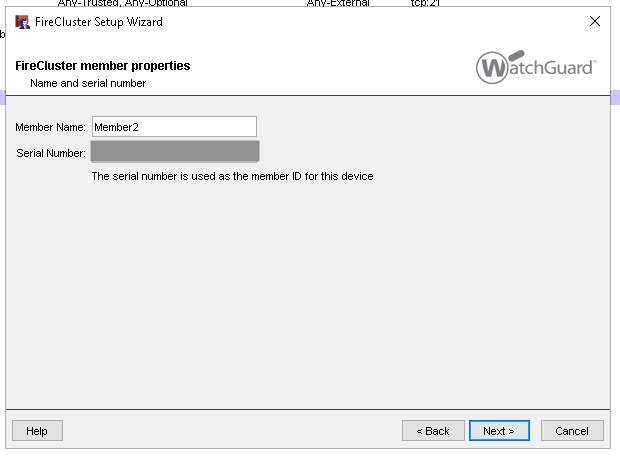
18. Set the second device’s Cluster Interface IP address. This needs to be a unique IP that is not use anywhere else inside of the network. For example, we have used 1.0.1.2/24.

19. Set the Management IP address for the second device. If using the Trusted interface, this should be an IP address on the Trusted network that is not in use and not included in the DHCP scope. Click Next.

20. Verify the settings of the FireCluster. Click Next and click Finish to complete the wizard.
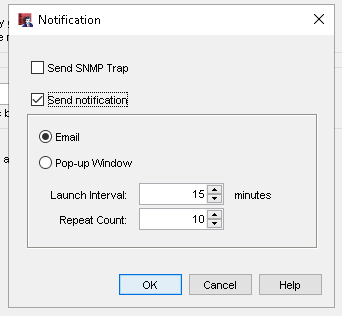
21. Once in the FireCluster Configuration window, click the Advanced tab. If you have a logging or Dimension server set up to send email notifications, select Notification > Send Notification > Email to receive email alerts about FireCluster events.
22. Click OK on all open windows and save the configuration to the firewall.
Completing the FireCluster
Once the FireCluster configuration is saved, it’s time to physically connect the two devices. Before doing so, it is a good idea to have a switch or hub available to be able to connect into both firewalls. For this, connect the Trusted interface from both firewalls into the switch/hub, as well as your computer. This will allow you to see both firewalls.
Connect the two devices together over the interface that was set for the Cluster connection (Step 10) and make sure the second device is powered on.
Open Firebox System Manager. Select Tools > Cluster > Discover Member.
Monitor the Front Panel of Firebox System Manager and ensure one device is the Master and the second device is the Backup Master.
Once the FireCluster shows both devices, select Tools > Failover Master to test the failover. Verify that the roles of the two devices change.
Once your physical setup is complete, the FireCluster is ready to be implemented into your environment. It is key to ensure that all ports are physically connected the same on both firewalls, otherwise the FireCluster will not properly fail over.