
WatchGuard’s Cloud Visibility solution provides cloud logging and reporting for T- or M-series firewalls. The licensing version on the firewall dictates the amount of logging retention available by default.
Basic Security Suite: 24 hours of logging retention
Total Security Suite: 30 days of logging retention
For more information on Cloud Visibility, see our blog post here
Cloud Visibility has recently added new features, including the ability to send email alerts. When configuring Cloud Visibility for your firewall, scheduling email alerts and recurring reports can help you stay aware of important events happening on your network.
Schedule Reports through Cloud Visibility
Scheduled reports will allow you to keep an eye on overall behavior and usage through your firewall. Reports can be scheduled on a daily, weekly, monthly, or one-time run basis.
1. Log into your account at www.watchguard.com
2. Select My WatchGuard > WatchGuard Cloud
3. Once you are in Cloud Visibility, select Administration > Scheduled Reports

4. Select Add Scheduled Report

5. Enter a Schedule Name and Description, and click Next
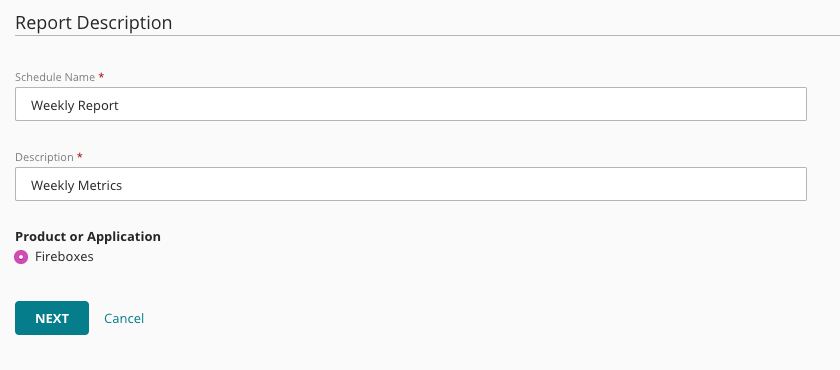
6. Select if this report is for All Fireboxes in your Cloud Visibility, or a specific Individual Firebox

7. Select the type of report to generate and click Next

8. Specify the Frequency, Day and Time for the report generation, and click Next

9. Set the Report Recipients email address, and click Next

10. Review the settings and click Save Report
Set Alerts through Cloud Visibility
Alerts will allow you to trigger email notifications through specific actions on your firewall. Before alerts will generate through Cloud Visibility, actions must be set in the firewall’s policy configuration to trigger the warning.
1. Log into your account at www.watchguard.com
2. Select My WatchGuard > WatchGuard Cloud
3. Once you are in Cloud Visibility, select Administration > Notifications

4. Select Rules from the left navigation menu and select Add Rule

5. Set a Name for the new alert
6. For Notification Source select Devices, and for Notification Type select Device Alarms

7. Set Delivery Method to Email, and set the desired Frequency. Also make sure to set the Subject and Recipients, and click Next.
