

There is often a need to restrict what devices can connect to a network. One of the easiest ways to do this is by MAC address. This allows you to block a device, regardless of the IP address it has assigned. On a WatchGuard firewall, you can restrict on both physical connections as well as wireless connections managed on the firewall.
Restricting by MAC Address on Physical Port
If you would like to restrict by MAC address on a physical interface, open Network > Configuration in Policy Manager. Next, open the physical interface you would like to control.
Select the MAC Accesss Control tab at the top. Make sure to check the box for Restrict access by MAC address, then click Add.
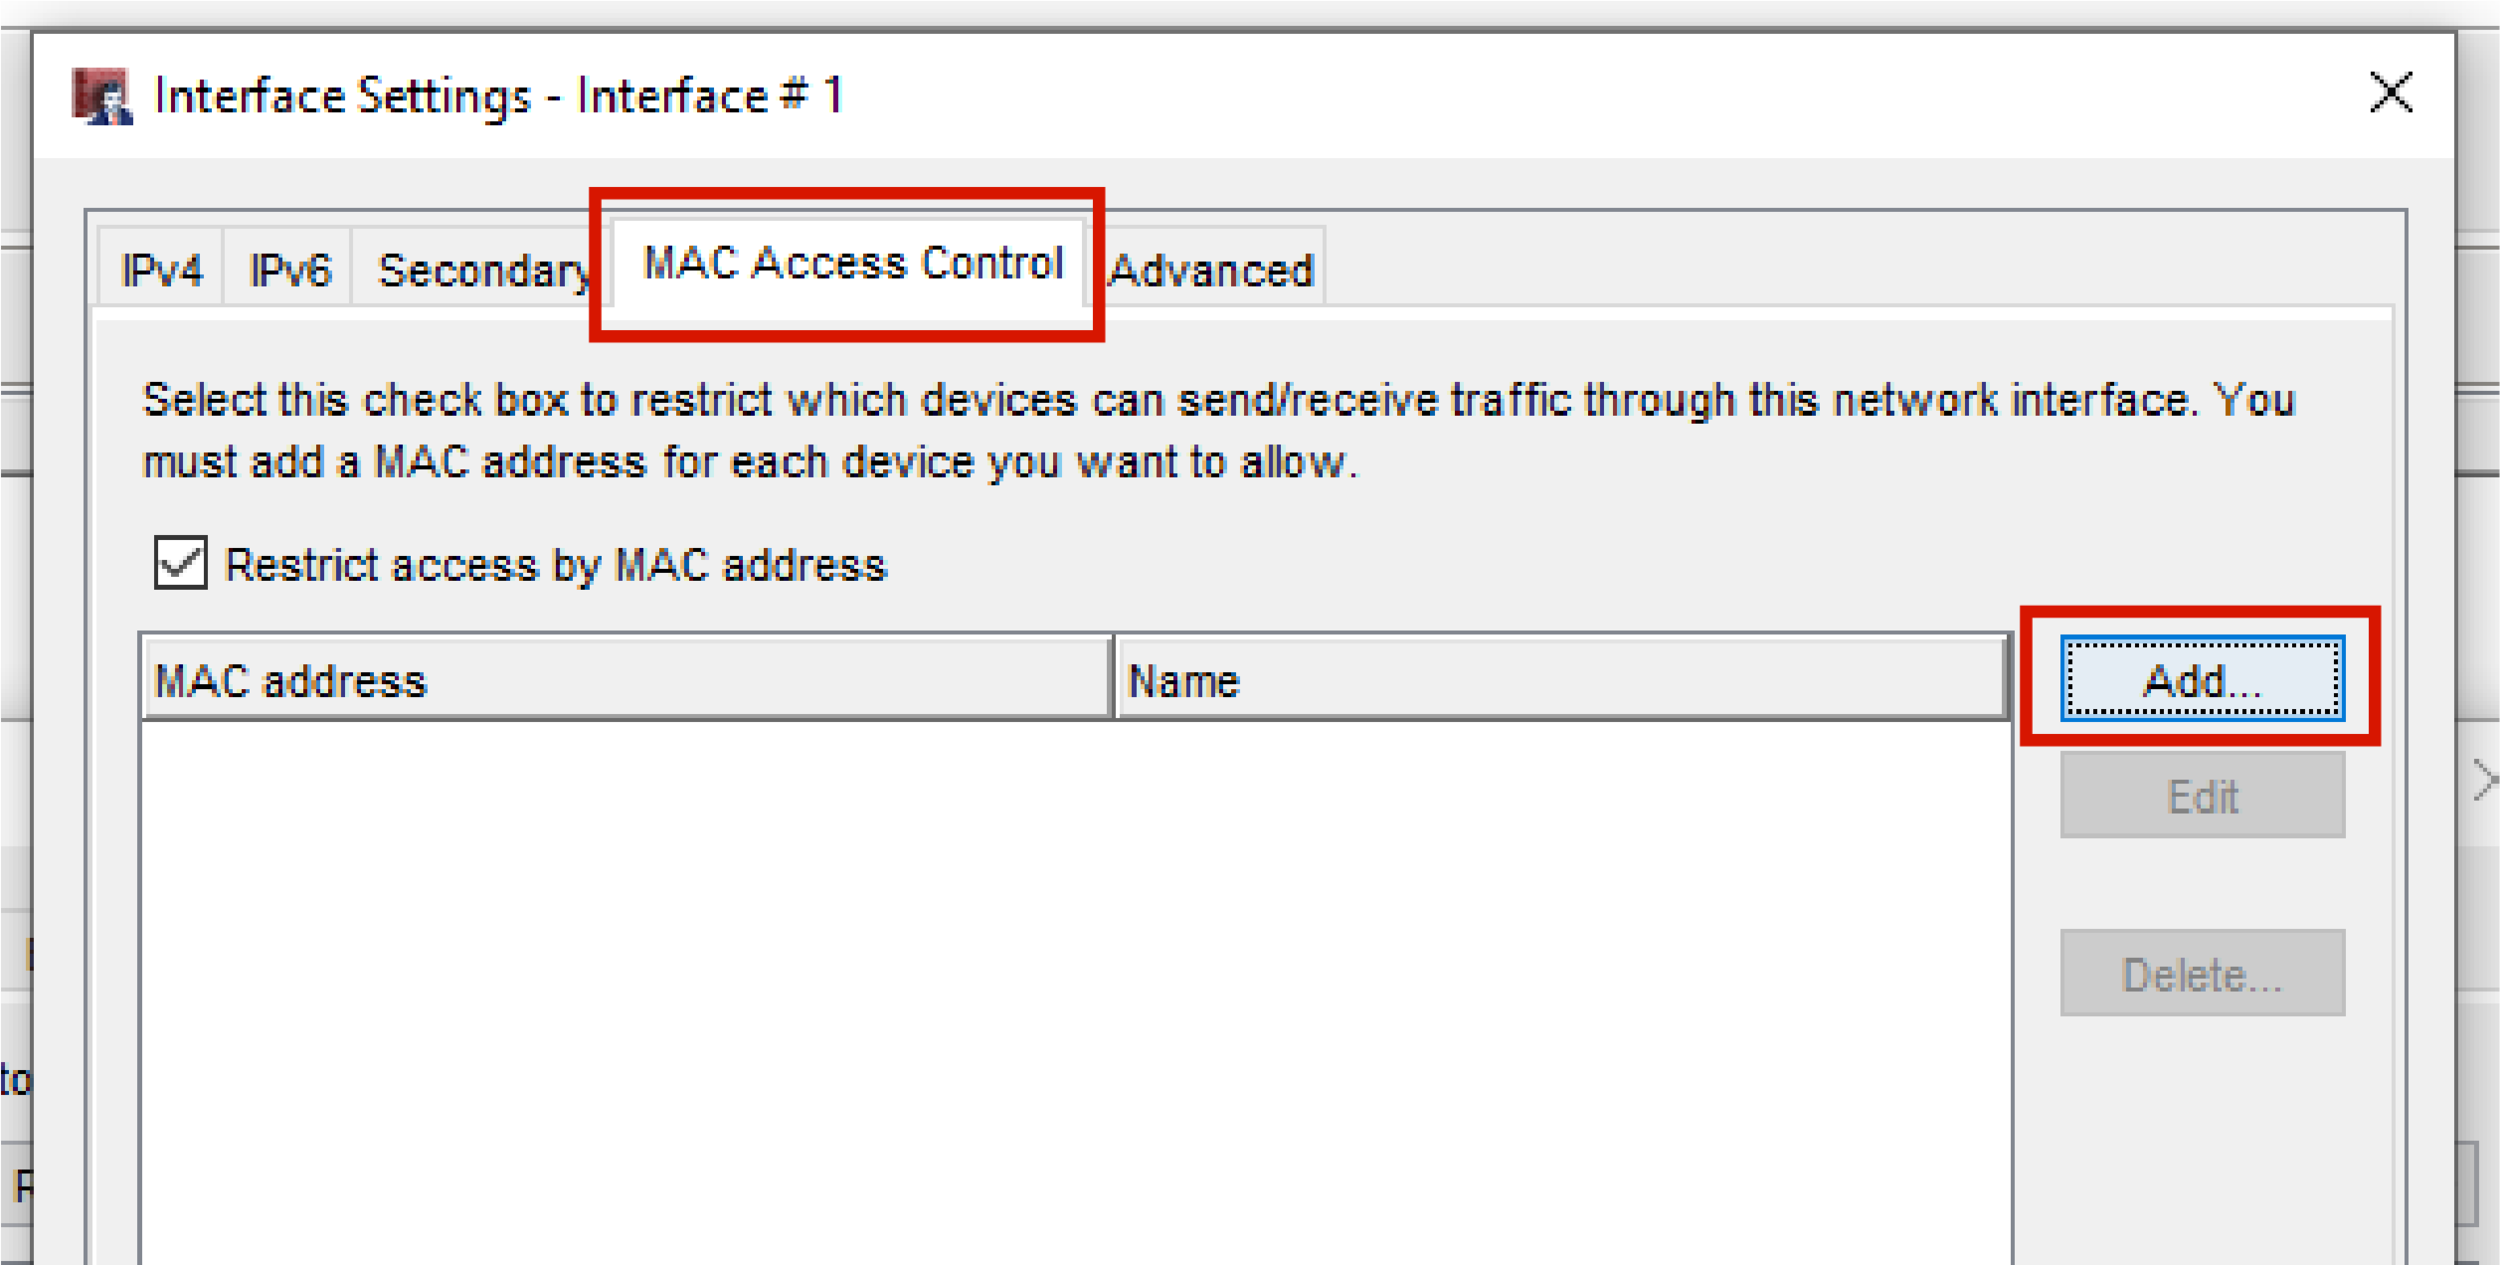
Input the MAC address and device name for easy identification.

Restricting by MAC Address through Gateway Wireless Controller
If you are using Gateway Wireless Controller, you can deny access by MAC address through your SSIDs as well. First, click Settings inside of the Gateway Wireless Controller window.

Next, select the MAC Access Control tab. You can input the MAC addresses you wish to restrict in the Denied MAC Addresses list.

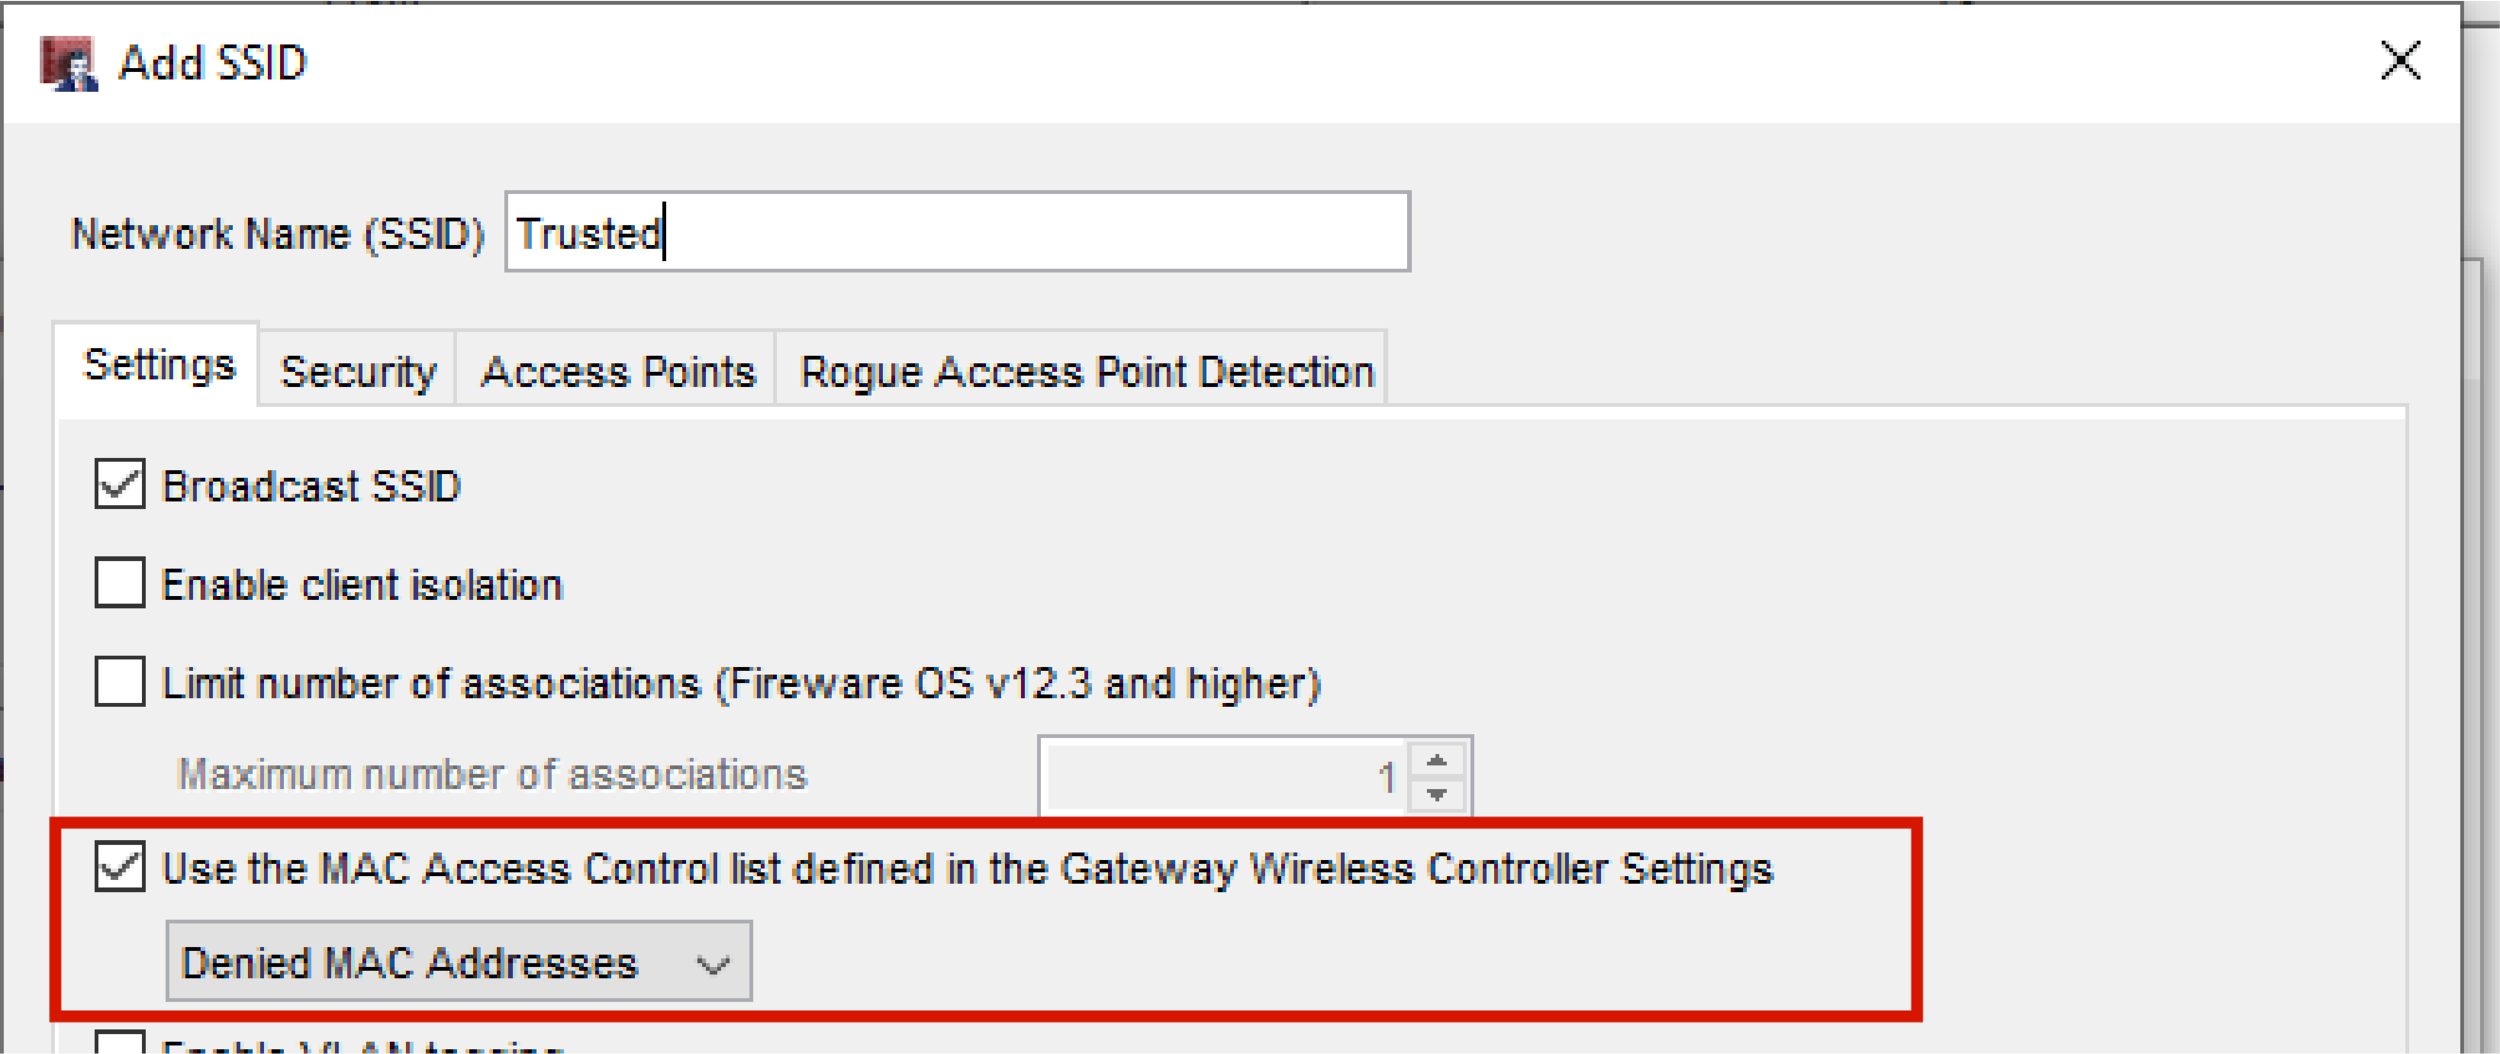
Once you have the list updated, open your SSID. Check the box for Use the MAC Access Control List, and select the Denied MAC Addresses option.
Restricting by MAC Address through On-Box Wireless
If you have a T- series firewall with built-in wireless, you can restrict by MAC address as well. Select Network > Wireless. Click Configure next to the Access Point you want to apply changes to.

Select the MAC Access Control tab. Check the box for Restrict Access by MAC address, and input your list of devices.
